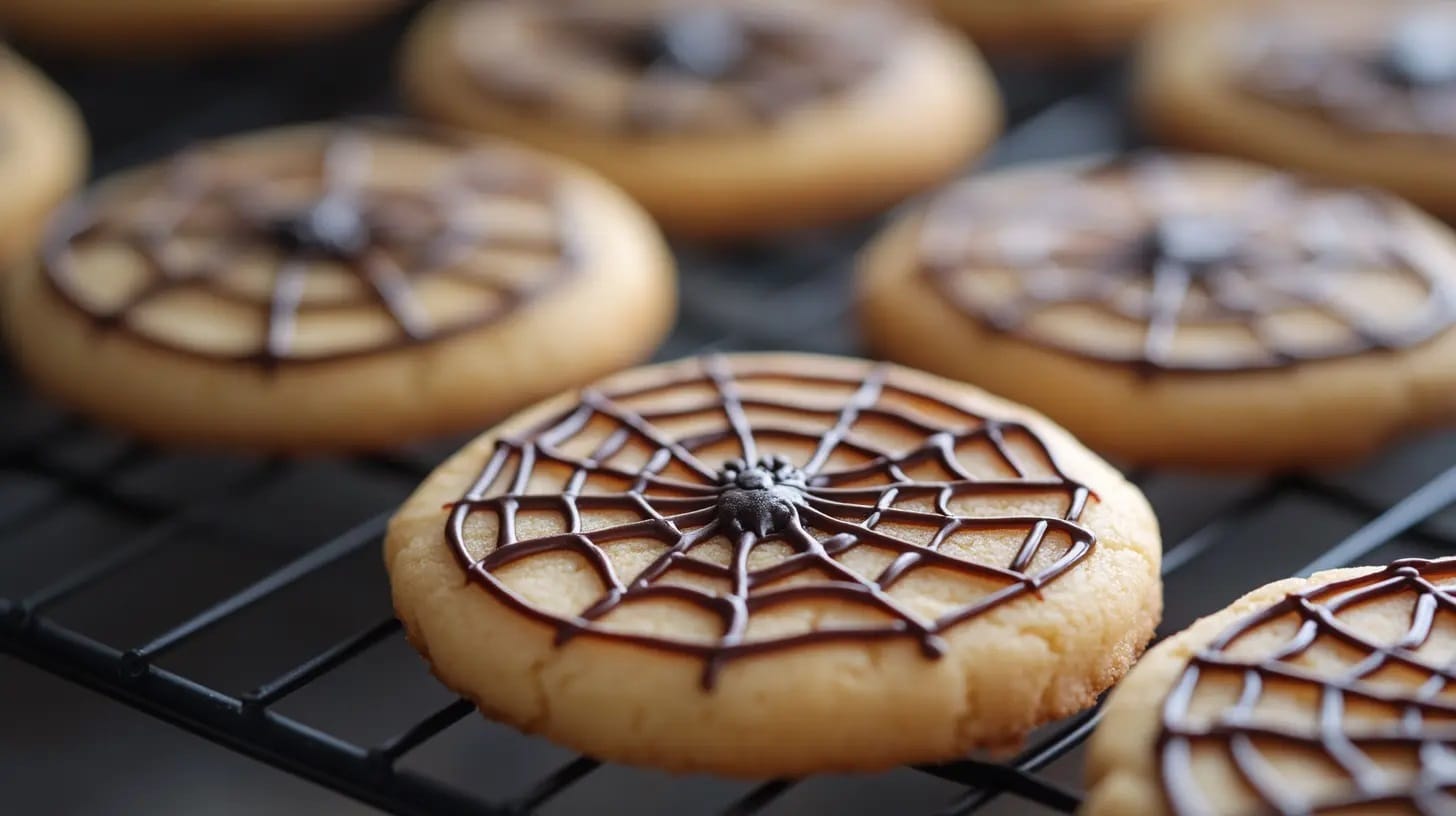
“If you’re searching for a fun and simple way to bring festive flair to your baking, spider web cookie stamp cookies easy recipe is the perfect solution. These cookies are a delightful addition to Halloween parties, fall gatherings, or any occasion where a spooky yet delicious treat is in order.
Not only do they look professional, but they’re also incredibly easy to make with the help of a cookie stamp. This simple tool ensures that every cookie is perfectly embossed with a spider web design, saving time and effort in the decorating process. For an overview of how cookie stamps work and tips for beginners, this spider web cookie stamp cookies easy recipe will guide you through every step.
In this article, you’ll learn everything you need to know about making these cookies, from the essential ingredients and tools to detailed baking and decorating instructions. With a little practice, you’ll master the art of creating stunning, spooky cookies that everyone will love using this spider web cookie stamp cookies easy recipe!”
Table of Contents
What Are Cookie Stamps, and Why Use Them?
Cookie stamps are small, decorative tools used to imprint patterns or designs into cookie dough. They’re often made from materials like wood, silicone, or plastic and come in various themes, including spider webs, snowflakes, and holiday designs.
The main advantage of using a cookie stamp is its simplicity. Instead of manually decorating each cookie with intricate designs, you can press the stamp into the dough to create a professional-looking impression in seconds. This is especially useful during busy holiday seasons when time is of the essence.
Benefits of Cookie Stamps:
- Consistency: Every cookie looks uniform and polished.
- Time-Saving: Embossing designs is much faster than hand-piping details.
- Versatility: Use them for various themes and occasions.
To explore creative ways to decorate cookies using stamps, visit this comprehensive resource. Whether you’re a beginner or a seasoned baker, cookie stamps are a must-have tool for decorative baking.
Ingredients for Spider Web Cookie Stamp Cookies
To make these cookies, you’ll need basic pantry staples and a few extras for decoration.
Basic Cookie Dough:
- 2 ½ cups all-purpose flour
- 1 cup unsalted butter (softened)
- ¾ cup granulated sugar
- 1 large egg
- 1 teaspoon vanilla extract
Optional Flavor Additions:
- ½ teaspoon almond extract (for a nutty flavor)
- Zest of one orange or lemon
For Decoration:
- Royal icing (black and white for a classic spider web effect)
- Food coloring (optional for adding vibrancy)
- Edible glitter, candy pearls, or sprinkles for added flair.
Step-by-Step Recipe for Spider Web Cookies
Here’s how to make these delicious cookies from start to finish:
1. Prepare the Dough
- In a medium-sized bowl, whisk together flour and a pinch of salt.
- In a separate bowl, cream butter and sugar until light and fluffy using a hand or stand mixer.
- Add the egg and vanilla extract to the butter mixture, mixing until fully incorporated.
- Gradually add the dry ingredients, mixing on low speed until the dough comes together.
- Wrap the dough in plastic wrap and refrigerate for at least 30 minutes. This step is crucial to firm up the dough for clean stamping.
2. Stamp and Shape the Cookies
- Preheat your oven to 350°F (175°C).
- Roll out the chilled dough on a lightly floured surface to about ¼-inch thickness.
- Lightly dust the spider web cookie stamp with flour to prevent sticking.
- Press the stamp evenly onto the dough, ensuring the design is clear and crisp.
- Use a round cookie cutter to cut out the stamped designs.
3. Bake the Cookies
- Arrange the cookies on a baking sheet lined with parchment paper, leaving about 1 inch of space between them.
- Bake for 10–12 minutes or until the edges are lightly golden. Avoid overbaking to preserve the soft texture.
- Allow the cookies to cool completely on a wire rack before decorating.
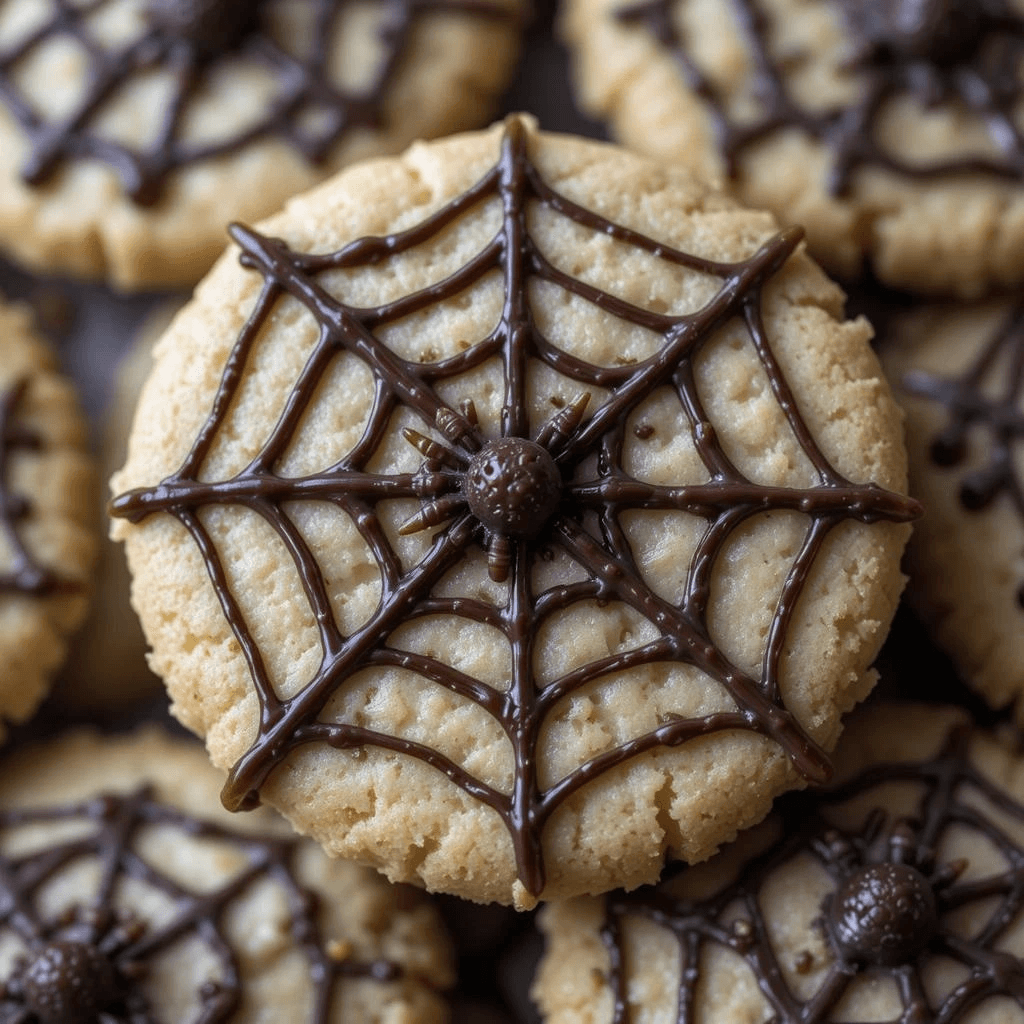
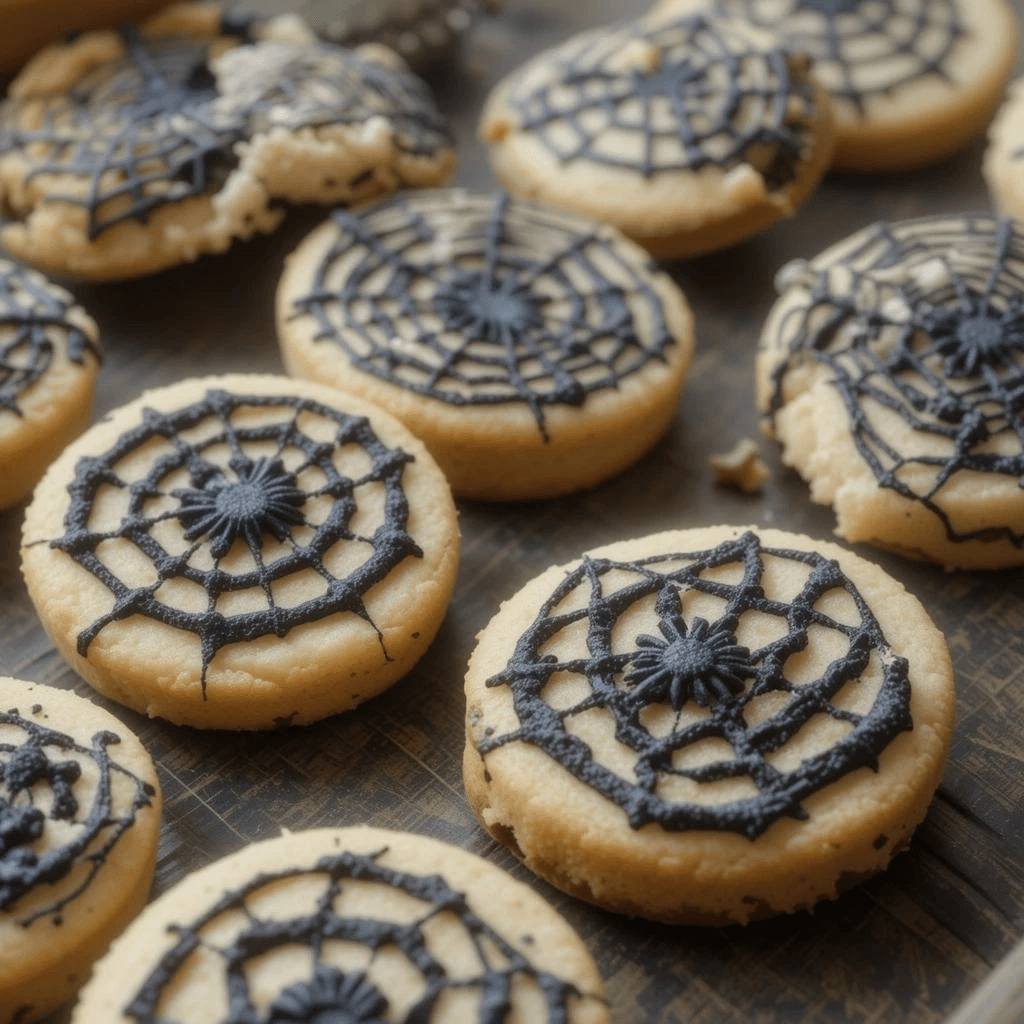
4. Decorate the Cookies
- Divide royal icing into two portions, coloring one black and leaving the other white.
- Using a piping bag, outline the spider web design with black icing and fill in the spaces with white icing.
- Optional: Use a fine paintbrush to blend the colors for a marbled effect or add edible glitter for sparkle.
Tips for Perfect Spider Web Cookie Stamp Cookies
Even with a simple recipe, small adjustments can elevate your cookies to the next level. Here are some expert tips:
- Chill the Dough: Chilling prevents the dough from spreading, ensuring the stamped design remains sharp.
- Use the Right Dough: Stick to no-spread sugar cookie recipes for the best results. Doughs with too much leavening can distort the design.
- Flour the Stamp: A light dusting of flour or powdered sugar on the stamp keeps it from sticking.
- Experiment with Colors: Black and orange are perfect for Halloween, but you can use pastel colors for spring or winter themes.
- Test Before Baking: Practice stamping a few pieces of dough to perfect your technique.
Creative Variations
Spider web cookies are versatile and can be adapted for different tastes and occasions.
Dough Variations:
- Chocolate Dough: Replace ½ cup of flour with cocoa powder for a rich, chocolatey flavor.
- Spiced Dough: Add 1 teaspoon of cinnamon and ½ teaspoon of nutmeg for a warm, fall-inspired flavor.
Decoration Ideas:
- Royal Icing Effects: Create marbled icing by swirling black and white together.
- Edible Embellishments: Add candy pearls or edible glitter for a luxurious touch.
- Themed Stamps: Swap the spider web design for snowflakes during winter or flowers for spring celebrations.
FAQS
1. How to make cookies in 7 steps?
Making cookies is simple and enjoyable. Here are the 7 basic steps:
- Gather Ingredients: Assemble all the necessary ingredients like flour, sugar, butter, eggs, and flavorings.
- Prepare Dough: Mix the wet ingredients (butter, sugar, eggs, etc.) and gradually add the dry ingredients (flour, baking powder, salt).
- Chill Dough: Refrigerate the dough for at least 30 minutes to make it easier to handle and prevent spreading during baking.
- Shape or Scoop: Roll out the dough for cut-out cookies or scoop portions for drop cookies.
- Bake: Preheat the oven and bake the cookies according to the recipe, usually 10–12 minutes at 350°F (175°C).
- Cool: Allow cookies to cool on a wire rack to prevent sogginess.
- Decorate or Serve: Add icing, sprinkles, or other decorations if desired, then enjoy!
2. How do you use cookie stamps on sugar cookies?
Using cookie stamps on sugar cookies is easy:
- Prepare the Dough: Use a no-spread sugar cookie dough recipe to ensure the design holds its shape.
- Chill the Dough: Refrigerate the dough for 30 minutes before stamping to prevent sticking.
- Flour the Stamp: Lightly dust the cookie stamp with flour to avoid sticking to the dough.
- Press the Stamp: Roll out the dough to an even thickness (about ¼ inch). Firmly press the stamp onto the dough to imprint the design.
- Cut Out the Cookies: Use a round cookie cutter to trim around the stamped design.
- Bake and Decorate: Bake the cookies as directed and decorate as desired.
3. How do you make a spider web at home?
You can create a spider web at home using simple materials or decorating techniques:
- DIY Web with String:
- Use black or white yarn to create a web pattern. Tie strings across a circular frame (like a hula hoop) to form the base.
- Weave additional strands in concentric circles, tying knots where the strings intersect.
- Paper Spider Web:
- Fold a piece of black paper into a triangle. Cut out shapes along the edges, similar to making snowflakes. Unfold to reveal a spider web design.
- Icing Webs for Cookies:
- Use royal icing to pipe concentric circles on a cookie. Drag a toothpick outward from the center to create a web effect.
4. How are web cookies created?
Web cookies are small pieces of data stored on a user’s browser by a website. They are created as follows:
Cookie Used for Functionality: When you revisit the site, your browser sends the cookie data back to the server, enabling personalized experiences like saved logins, shopping carts, or site preferences.
User Visits a Website: When you visit a website, it sends a request to your browser.
Server Sends Cookie Data: The website’s server generates and sends cookie data to your browser, often containing information like session IDs or preferences.
Browser Stores the Cookie: The cookie is stored locally on your device, categorized as either a session cookie (temporary) or persistent cookie (long-term).
Conclusion
Making spider web cookie stamp cookies is a fun and rewarding experience that combines creativity with delicious results. Whether you’re preparing for Halloween or simply exploring new baking ideas, these cookies are guaranteed to impress.
With the help of cookie stamps and a few simple ingredients, you can achieve professional-looking results right in your own kitchen. Try this recipe today and discover how easy it is to elevate your baking game!